Friday, 29 June 2012

How to make your own shabby log cabin block for paper piecing

Doing your own paper piecing blocks is not as hard as it looks. People get intimidated because it looks so intricate when done Especially the log cabin is easy to do. I needed one for a scrap swap i am hosting, and i thought i would show you how it is done.

You need a marker, a ruler and the block size. I need one 6" so i used my 6" ruler


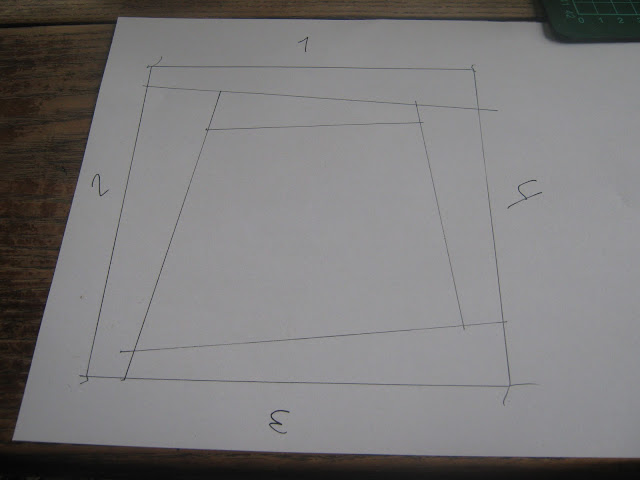
First draw up the block. Afterwards name the sides 1 to 4 (i did that later, but should have done it here)


Then make your first line on side one. I want an uneven look so i went for shabbiness remember that the outer 1/4 inch is seamallowance.


rotate clockwise to side 2 and make a line


then rotate clockwise to side 3


and then side four


then back to side 1


Keep going untill you have the whole block done


Name the centerpiece 1


Then you start at side 4 naming that piece 2


Now you rotate counterclockwise and name the piece on side 3 for 3


rotate counterclockwise again and mark side 2 ad number 4


Continue like that untill the whole block is numbered


And youre now good to go for piecing it! same procedure as in the scrap string quilt block :) http://omnipotentdaydreamer.blogspot.dk/2012/06/scrappy-string-quilt-tutorial.html

Scrappy string quilt block tutorial with PDF

It has been a while ;) I was suddenly up to both ears in kids, exam and commitments, so no time for blogging. I have holiday now and its time to show the world my creativnes
First up is a tutorial. I am swap mama in a swap and while researching tutorials i missed one on scrappy uneven string blocks. so i decided to try to make one myself in the bottom of the post you can find it as a PDF file


First a normal piece of white paper.


Draw the block and make your stripes how you like them


Number from the middle to one side


repeat on the other side


Find your scraps (and iron them)


Align your center piece. Use needles to keep it in place and as markers for the lines


add another layer of fabric and follow the line between center and number 2 piece (here the pins come in handy since they guide you where the line is) remember that the pretty side is down! and remember to keep room for seam allowance


turn around after pinning and sew the line, remember to start ½ an inch outside the block!


Turn around and cut down seam allowance to 1/4 inch


turn the fabric and press it gently


You are now ready for step 2


Turn around and put in 2 needles marking the next line


find your fabric (i used scraps fro another block to make some fun


Align after the needles (remember seam allowance)


Stitch the line and repeat the pressing  procedure


Keep sewing like that until one side is done


Like this


flip the block and do exactly the same on the other side


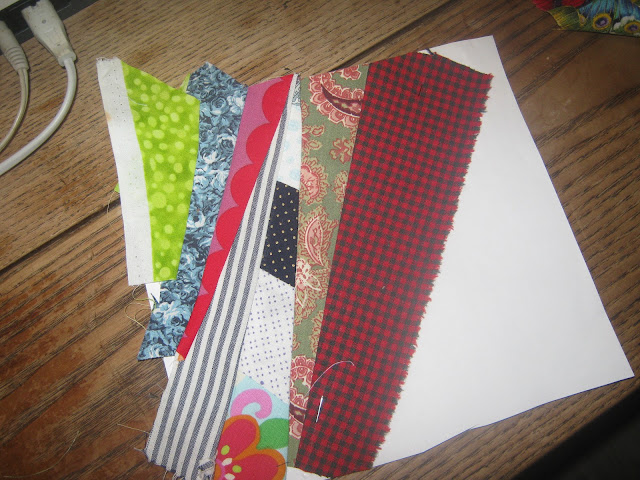
Once done youre block will look like this:


Press it all gently and then remove paper


Press again and then go put the ruler on. My block is supposed to be 6"
Dont forget to check if youre having the ruler inside the area that you actually stitched!


Cut and youre done!


My Dear firend Naomi from down under did a little magic amd made a nice pdf file you can download:


scrappy tutorial PDF