Friday, 29 June 2012

How to make your own shabby log cabin block for paper piecing

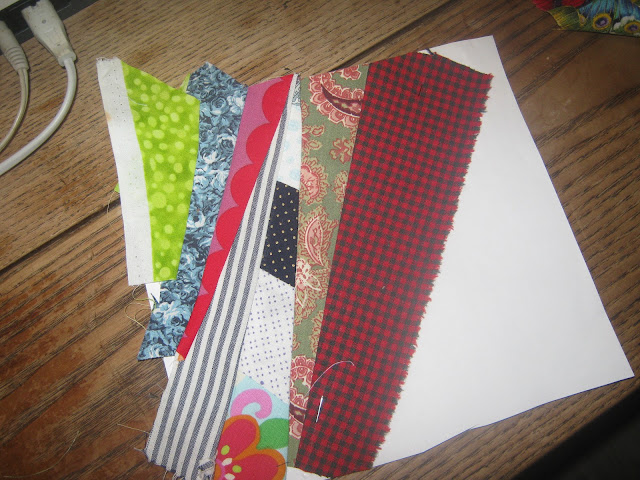
Doing your own paper piecing blocks is not as hard as it looks. People get intimidated because it looks so intricate when done Especially the log cabin is easy to do. I needed one for a scrap swap i am hosting, and i thought i would show you how it is done.

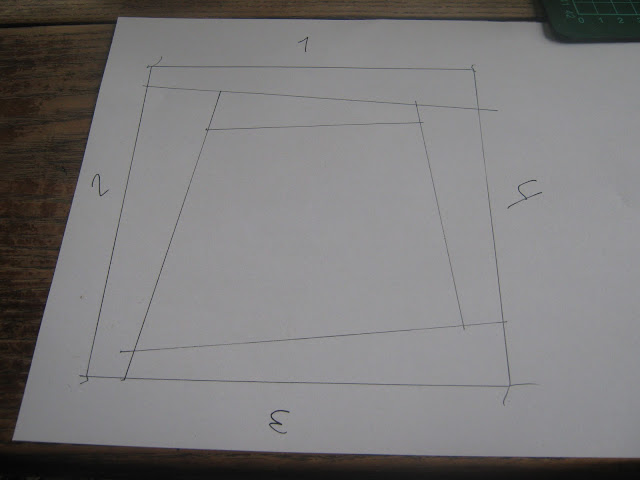
You need a marker, a ruler and the block size. I need one 6" so i used my 6" ruler


First draw up the block. Afterwards name the sides 1 to 4 (i did that later, but should have done it here)


Then make your first line on side one. I want an uneven look so i went for shabbiness remember that the outer 1/4 inch is seamallowance.


rotate clockwise to side 2 and make a line


then rotate clockwise to side 3


and then side four


then back to side 1


Keep going untill you have the whole block done


Name the centerpiece 1


Then you start at side 4 naming that piece 2


Now you rotate counterclockwise and name the piece on side 3 for 3


rotate counterclockwise again and mark side 2 ad number 4


Continue like that untill the whole block is numbered


And youre now good to go for piecing it! same procedure as in the scrap string quilt block :) http://omnipotentdaydreamer.blogspot.dk/2012/06/scrappy-string-quilt-tutorial.html

Scrappy string quilt block tutorial with PDF

It has been a while ;) I was suddenly up to both ears in kids, exam and commitments, so no time for blogging. I have holiday now and its time to show the world my creativnes
First up is a tutorial. I am swap mama in a swap and while researching tutorials i missed one on scrappy uneven string blocks. so i decided to try to make one myself in the bottom of the post you can find it as a PDF file


First a normal piece of white paper.


Draw the block and make your stripes how you like them


Number from the middle to one side


repeat on the other side


Find your scraps (and iron them)


Align your center piece. Use needles to keep it in place and as markers for the lines


add another layer of fabric and follow the line between center and number 2 piece (here the pins come in handy since they guide you where the line is) remember that the pretty side is down! and remember to keep room for seam allowance


turn around after pinning and sew the line, remember to start ½ an inch outside the block!


Turn around and cut down seam allowance to 1/4 inch


turn the fabric and press it gently


You are now ready for step 2


Turn around and put in 2 needles marking the next line


find your fabric (i used scraps fro another block to make some fun


Align after the needles (remember seam allowance)


Stitch the line and repeat the pressing  procedure


Keep sewing like that until one side is done


Like this


flip the block and do exactly the same on the other side


Once done youre block will look like this:


Press it all gently and then remove paper


Press again and then go put the ruler on. My block is supposed to be 6"
Dont forget to check if youre having the ruler inside the area that you actually stitched!


Cut and youre done!


My Dear firend Naomi from down under did a little magic amd made a nice pdf file you can download:


scrappy tutorial PDF

Monday, 21 May 2012

Silence before the storm...

I have not had that much time to write in the last couple of days. Not that i didn't want to, i have simply been to busy with school. Its like a tidal wave right now. Either follow the current or get sucked under. We have so much to read and learn that my brain is working even in my sleep. I have been deciding the faith of handicapped and mental ill persons in my dreams the last couple of nights and have woken up frustrated because i wanted to give mister X an apartment and a pension due to his schizophrenia illness, but the law didn't give me anything to grant it with and i therefor had to watch him go back to living on the street. Who says studying social worker was easy ;) I know that these dreams tackle my fear about not being able to help people who want it, but its a bit tiresome waking up frustrated morning after morning without any reason at all. after all i'm not yet qualified to make these decisions and therefor should be concentrating on getting qualified.

BUT besides working my butt of wwith reading and dreaming, I still take some time to be creative.

Friday, 20 April 2012

I want to show you a fairy tale

a year a go (at least!) I made this cute little picture for my son :) I was very pleased with the outcome and my son adores it, so since I have really felt like bragging about it. so here it goes ;)

I fell over this totally cute elefant http://cicadadaydream.blogspot.com/2009/05/ms-shade-garden-meet-mr-dogwood.html

and fount it perfect for a project i had in mind! I wanted to do some walhangings in frame for my youngest id, and this elephant cut in half would be perfect! so I made half  an elephant and stitched it on a fine background. The result looked like this


after making half the elephant I stitched it on the background fabric with a very fine embroidery stitch. handstiching would work too I guess, but I wanted the frame effect. I left a gap for stuffing and stuffed a bit of fiberstuffing in to make the elephant look 3D.i then had a bit off batting i ffixed on the backside with glue to make it look fluffy

Then I took a spray adhesive and sprayed it on the background for the photo frame (cheap cheap frame where i discarded the glass). I gently stretched the fabric over the background, and in this step it is important to make the background fabric near the elephant stick. Else your picture will look half done once youre done.

after this step I fixed it in the frame. Its the cutest elephant I have made so far :)


Thursday, 19 April 2012

Potato lasagne was the dish tonight

And it is always a hit. its cheap, healthy and filling :) oh and did i mention it tastes good?


today with both meat and lentils


Recipe is so simple

1-1½ kilo potatoes sliced in 1½ mm slices (we use with peel on since its full of vitamin c)
300g minced pork or beef
2 fine chopped onions
250 g green lentils (the small ones)
1 vegtable boullion dice
2 cans of chopped peeled tomatoes
1 clove garlic
salt
pepper
basil
oregano
thyme
and a bit of estragon


boil the lentils in water with the boullion for 15 minutes

sauté onion and meat and minced garlic in a pot. Addpeeled tomatoes and a little bit of water and let it simmer for 10 minutes. ad spice and turn off heat.

take a big ovenproof dish and grease it. put a good layer of potatoes in bottom, ad a layer of sauce and a layer of lentils.


 ad another layer of potatoes, sauce and lentils.


top off with a layer of potaoes and put a little oil on the top. 


season with some salt and pepper. put it in the oven at 200 degrees celcius for 1 hour.


enjoy eating ;)